
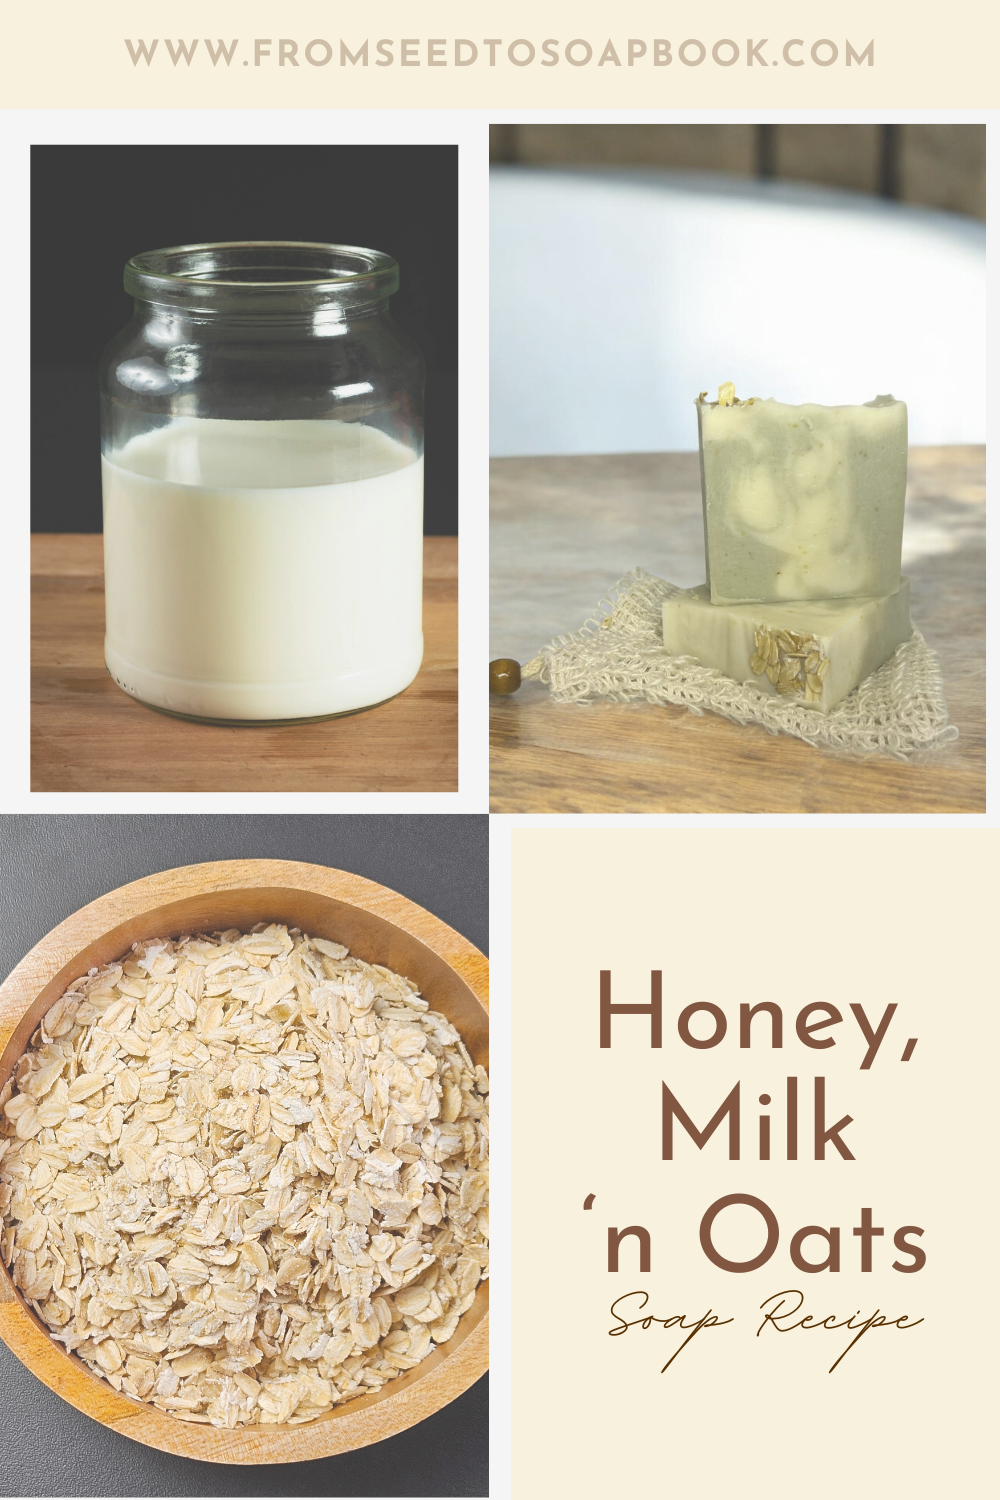
Honey, Milk, and Oats: Lard Soap Recipe
A Beginners Guide to Using Sugar in Soap
When you add milk, honey, fruit purees, or even beer to soap, you are essentially adding fuel to a fire. In the world of cold-process soap, sugar acts as a catalyst that causes the soap to reach much higher temperatures during the saponification process (the "cook").
While all soap heats up as it saponifies, sugar can push those temperatures into the danger zone, leading to a few common issues:
Cracking or "Volcanoes": If the soap gets too hot too fast, it expands. This can result in a deep "river" crack along the top or, in extreme cases, a "volcano" where the soap actually pushes up and out of the mold.
Discoloration: Sugars naturally caramelize when heated. If the batch isn't kept cool, a creamy white milk soap can quickly scorch into a deep tan or dark brown
Simple Tips for Sweet Success
Freezing Ingredients: To keep temperatures low, freeze milk or purees into ice cubes. Once frozen place in zip lock bags and label. When you are ready to make soap, you are already prepared.
Go Slow : However you usually add your lye to your distilled water -go slower. Pour lye even slower to the frozen liquid to ensure the lye is dissolving fully. Stirring throughout.
Cooler Temps: Try soaping at a lower temperature than usual and consider skipping the insulation (don't wrap your mold in towels) to help keep temps low. I usually soap around 110-115°F, when using sugars I soap around 100°F. *Soaping refers to the point where you combine the lye solution to the oils and start the saponification process.
Reduce Sugar Amounts: If you want the benefits of both milk and honey in one batch, the safest way to avoid a "soap volcano" is to reduce the amount of each.
A standard 2lb batch usually handles 2 tsp of honey easily.
A full water replacement would use 247g of milk in this recipe.
The Reduction Strategy: Since I want to use both in one batch, I simply cut them in half. I’ll use 1 tsp of honey combined with 122g of distilled water and 125g of frozen goat milk. This gives you the creamy feel of the milk and the big bubbles from the honey, but keeps the sugar levels low enough to prevent overheating.
This gives you that creamy, luxurious feel with lots of bubbles from the milk and honey, but it keeps the total sugar levels low enough to prevent overheating.
Partial Water Replacements: The exact split between your water and milk isn't what matters most—what matters is that your total liquid weight (in this case, 247g) stays exactly what your recipe requires. Never change your total liquid, lye, or oil amounts without running the numbers through a soap calculator first! In soap making, we can safely adjust and swap additives (like clays, oats, or honey), but we never tweak the actual soap formulation (the water-lye-to-fat ratio) without checking the math.
Why It’s Worth the Extra Effort
In commercial bars, "bubbles" are often created by synthetic detergents like SLS (Sodium Lauryl Sulfate). You get to skip synthetic surfactants and use a natural ingredient that is probably already in your house. Milk, honey, purees all contain sugar and that is a natural way to obtain beautiful bubbles and lather in your handmade soap. While animal fats like tallow and lard make a wonderfully creamy and hard bar, they can sometimes be a bit shy with the lather. Adding ingredients that contain sugar mimics the performance of synthetic surfactants you'd find in store-bought soap—giving you big, stable bubbles using an ingredient already in your pantry!
Never Made Soap Before?
If you are a brand-new beginner, I strongly suggest having a few successful, simple batches under your belt before experimenting with milk or sugars. If you aren't there yet, start with my beginner 100% Tallow Recipeor my 100% Lard Recipe. Your focus should be on mastering the basics: safe lye handling, precise measurements, and identifying trace.
Once you feel confident, a whole world of additives opens up—including goat milk, cow milk, or even breastmilk!
Your first few batches should be kept incredibly simple—avoid ingredients that need to be frozen or techniques like splitting batter for multiple colors. Instead, focus entirely on mastering the fundamentals: safe lye handling, precise measurements, organizing your workspace, and identifying the shift from emulsion to light and medium trace.
Without further ado, let’s make soap!
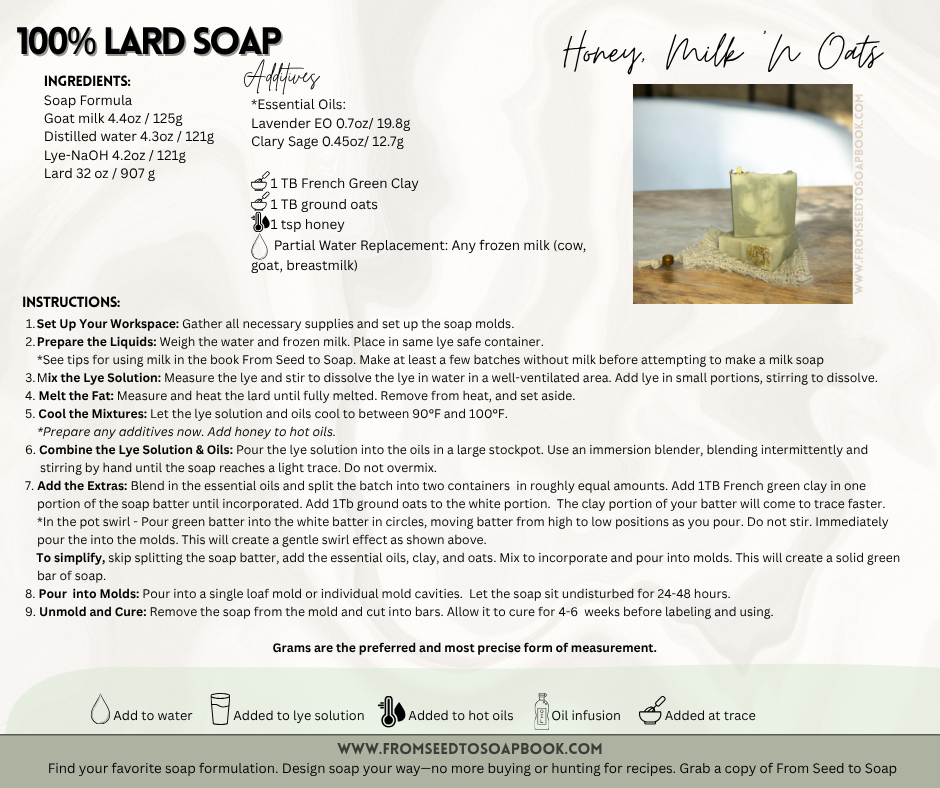
2lb Lard Soap Formula
Goat Milk 4.4oz / 125g
Distilled water 4.3 oz / 122g
Lye-NaOH 4.2oz / 121g
Lard 32 oz / 907 g
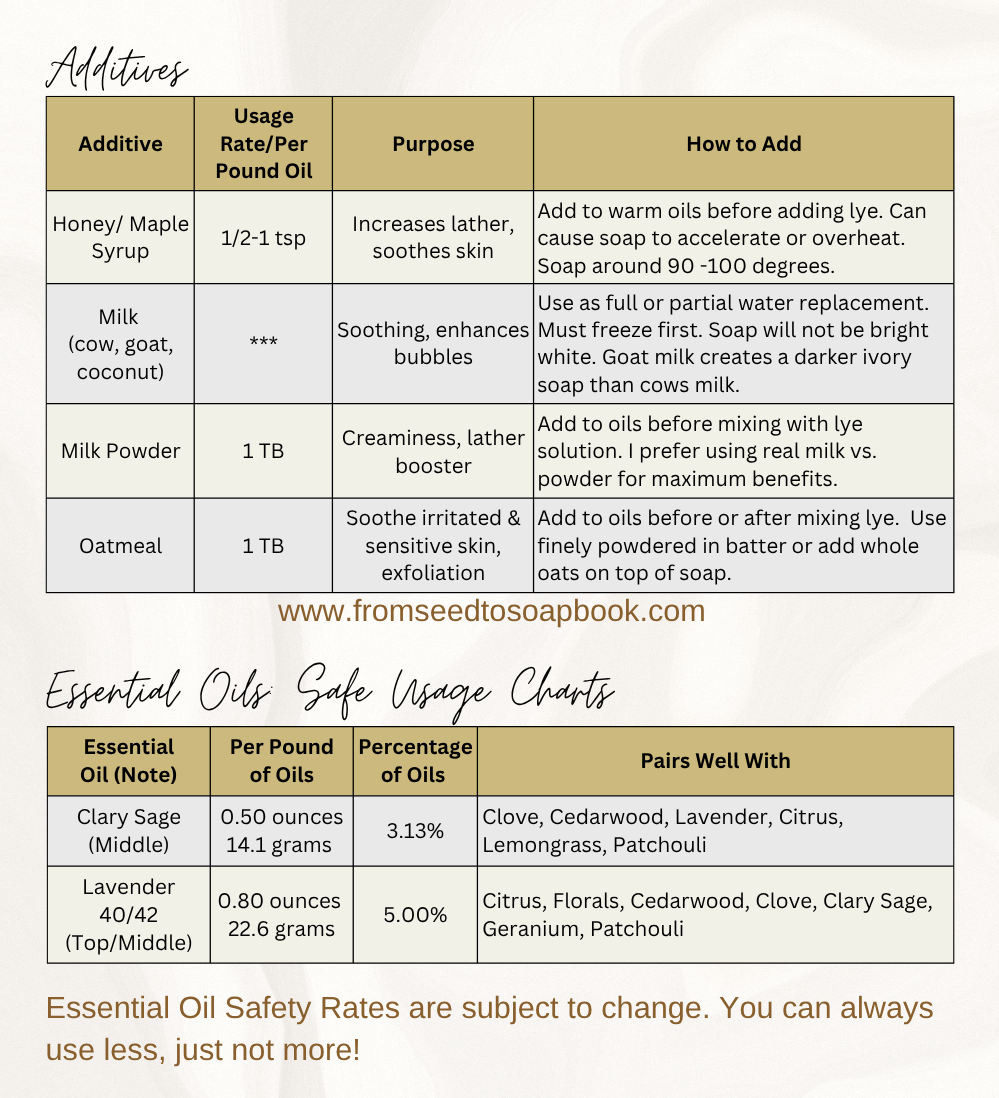
Essential Oils
Lavender EO 0.7oz/ 19.8g
Clary Sage 0.45oz/ 12.7g
Additives
1 TB French Green Clay
1 TB Gound Oats
1 tsp Honey
Step-by-Step Instructions
Set Up Your Workspace: Gather all necessary supplies and set up the soap molds.
Prepare the Liquids: Weigh the frozen cubes of goat milk. Add the distilled water.
Mix the Lye Solution: Measure the lye and stir to dissolve the lye in milk & water in a well-ventilated area. Add lye in small portions, stirring to ensure it dissolves.
(It is important to add lye a bit slower than usual when using frozen ingredients and to stir thoroughly to ensure all the lye is dissolved.)
Melt the Fat: Measure and heat the lard until fully melted. Remove from heat, and set aside.
Cool the Mixtures: Let the lye solution and oils cool to between 90°F and 100°F. *Prepare any additives now. Add the honey to the hot oils.
(Crystalized honey doesn’t mix well, make sure your honey is smooth and blended with oils well before adding the lye.)
Combine the Lye Solution & Oils: Once temperatures are within range, pour the lye solution into the oils in a large stockpot. Use an immersion blender, blending intermittently and
stirring by hand until the soap reaches a light trace. Do not overmix.
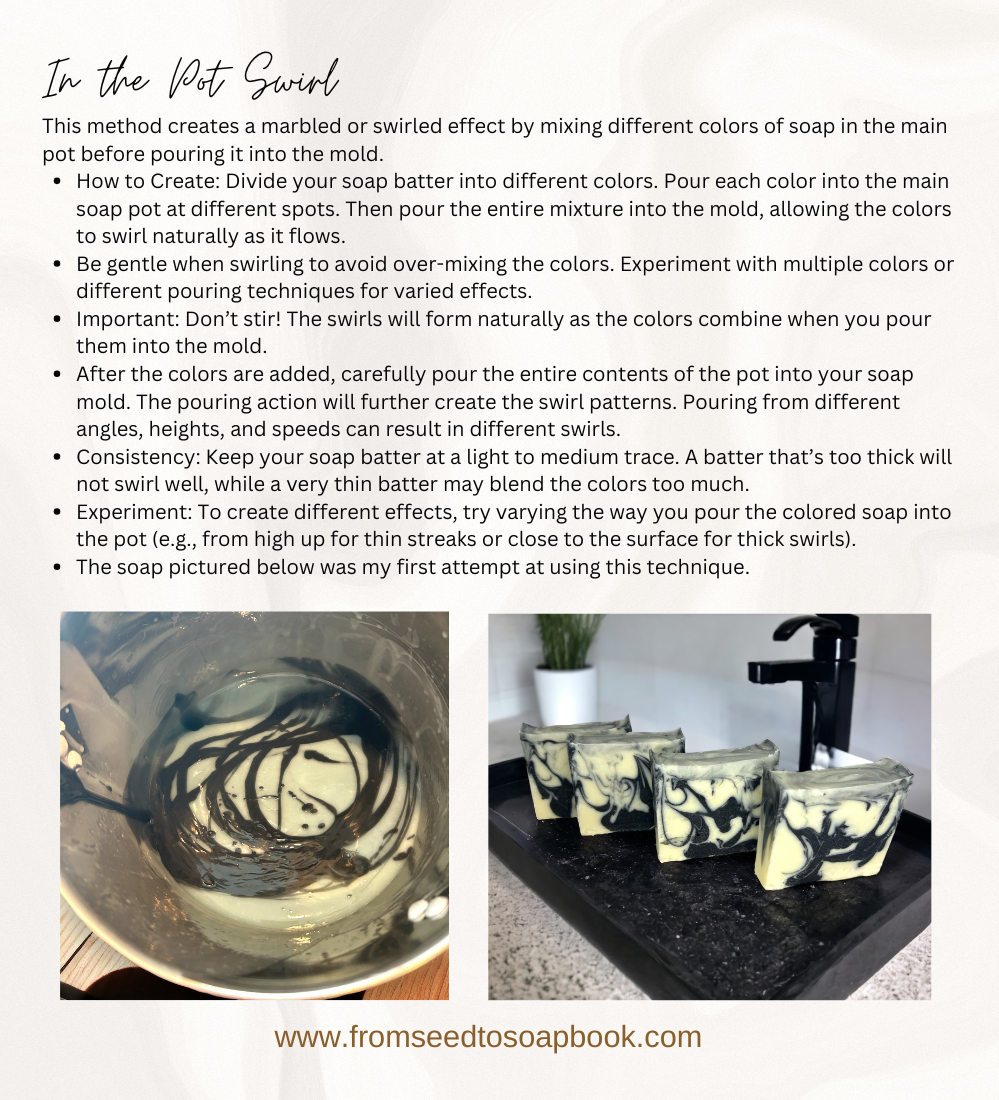
Add the Extras: Blend in the essential oils and split the batch into two containers in roughly equal amounts.
Add 1 TB French green clay in one portion of the soap batter until incorporated. Add 1Tb ground oats to the white portion. The clay portion of your batter will come to trace faster.
*In the pot swirl - Pour green batter into the white batter in circles, moving batter from high to low positions as you pour. Do not stir. Immediately
pour the into the molds. This will create a gentle swirl effect as shown above. (See below for a better description.)
To simplify, skip splitting the soap batter, add the essential oils, clay, and oats. Mix to incorporate and pour into molds. This will create a solid green bar of soap.
Pour into Molds: Pour into a single loaf mold or individual mold cavities. Let the soap sit undisturbed for 24-48
hours.
Unmold and Cure: Remove the soap from the mold and cut into bars. Allow it to cure for 4-6 weeks before labeling and using. (You can always test the soap ends or scraps in 5-7 days.)
Tips:
Fats, oils, lye, water (or water replacements) and essential oils must be weighed. Always use a digital scale for accuracy. Smaller units of measure - such as grams make measurements more accurate.
Essential oils (& fragrance oils) each have their own specific safe usage rate. You should never add them randomly or measure them using "tablespoons" or "drops." If you see a recipe that measures essential oils in drops or spoons, take it as a major red flag—that is a sign you haven not found a reliable resource.
Measuring your dry or stable additives by volume is totally fine. It’s perfectly safe to use teaspoons or tablespoons for: Clays (like French Green Clay), Ground Oats, Honey, activated charcoal, or Botanicals.
Remember: Essential oils and additives are always optional. You can always leave them out and still have a beautiful, functional bar of soap!

Safety Considerations
Making soap involves working with lye. If you’re new to making soap from scratch, it is imperative that you learn to make it safely. Soapmaking uses lye to turn oils into soap—once your soap is fully cured, there’s no lye left in the finished bar.
Lye is very alkaline, and the lye solution (or soap batter) can burn your skin (or eyes) if it splashes.
Protect yourself: Always wear gloves, goggles, and long sleeves. I like to wear an apron too. Regular glasses aren’t enough—goggles over them are best! A splash of lye will permanently etch your eyeglasses… so really - put the goggles over them and be a geek while you enjoy the science of making soap.
Ventilate your space: Work in a well-ventilated area. Open a window or turn on the oven fan.
Keep it controlled: Never leave lye or soap batter unattended. Keep kids and pets safely out of your workspace. Personally, I mix my lye in a lye-safe plastic pitcher in my kitchen sink and open the window. If a spill happens, it goes down the drain safely—and it even helps clean my pipes! Lye can discolor countertops, so protect your surfaces ahead of time. Soap batter can splash when mixing and pouring into molds. Grab some paper towels and prepare your area ahead of time.
Lye doesn’t have to be scary. Know the risks, take the safety precautions. With care, you’ll be perfectly safe. Check out my free lye safety download —or join me for a one-on-one virtual soapmaking session and let me mentor you through your first batch!
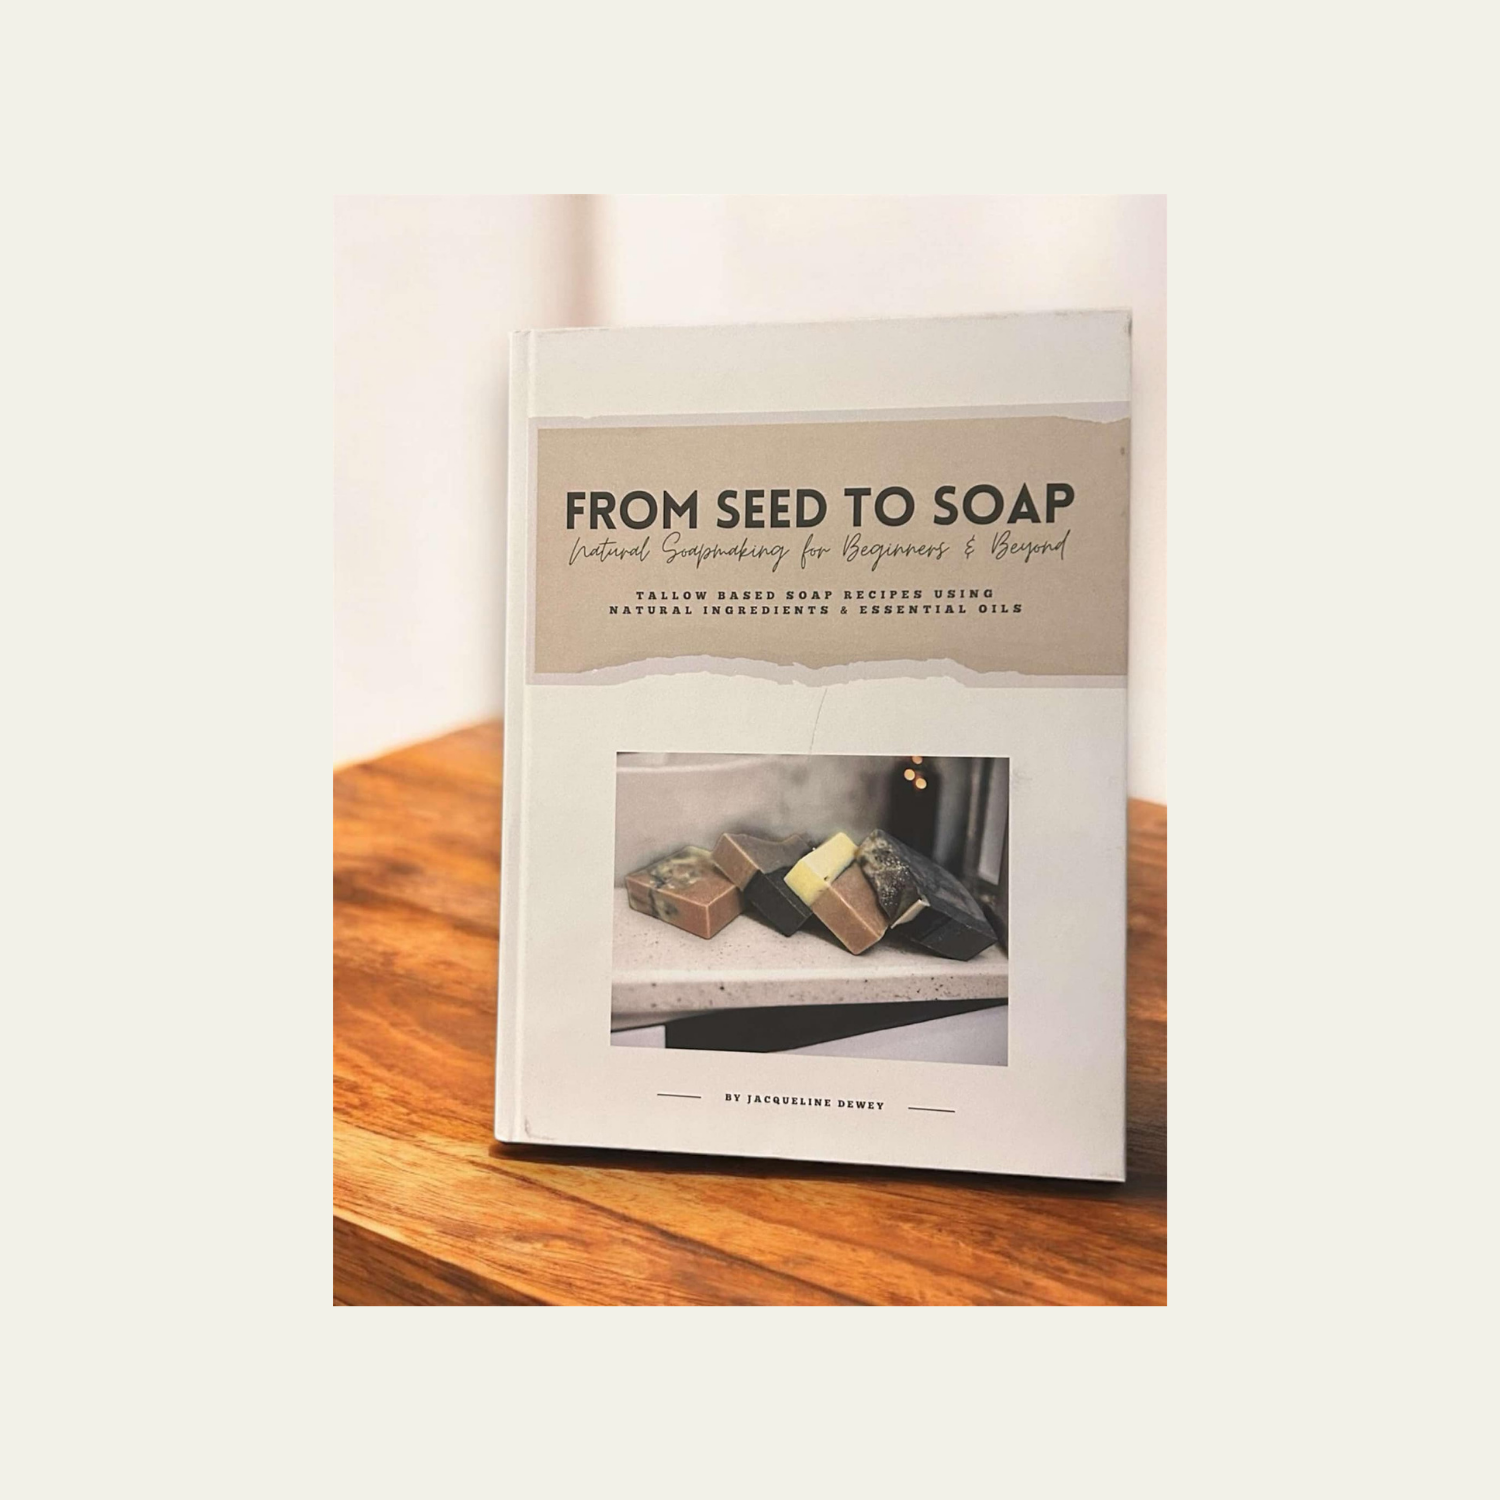
When I wrote From Seed to Soap, my goal was to make a book that was actually user-friendly. I didn't want you to have to dig through chapters of text just to find a usage rate while your
lye is cooling.
Instead, I packed it with easy-to-read reference pages:
Additive Charts: Quick details on over 40 ingredients (like honey, clay, and botanicals).
Essential Oil Rates: Exactly how much scent to add for a safe, fragrant bar.
Oil Properties: A snapshot of how different fats (like tallow or lard) affect your lather and hardness.
Bonus section filled with charts on making balms and salves!
If you’re looking for a guide that is easy to read and even easier to use, you can find all these charts and more in From Seed to Soap!
Want a free book preview or other free soapmaking resources?
Check out the store!
Disclosure: Some of the links on this site are Amazon affiliate links. This means I may earn a small commission if you make a purchase at no extra cost to you.